Friday, December 15, 2006
Silent Night Step By Step
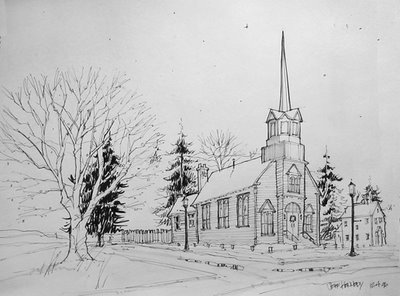
Here is the original sketch completed with felt tip pen and gray marker. This is the stage where I work out the composition for the painting. A number of sketches were completed so I could work out various compositional experiments.
Since this was to be a night or dusk scene, the values were pushed a few steps darker. No white paper would be visible. My target value pattern was a dark shape surrounding a light area (the roof).
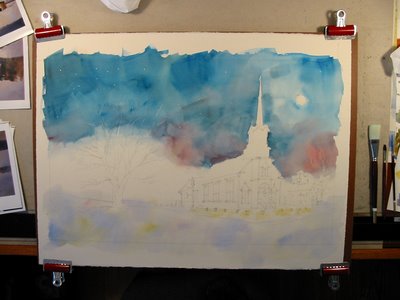
I completely soaked the paper and dried the church steeple area by blotting it with a cloth. I loosely applied the sky keeping in mind that I wanted it dark and that it would dry lighter. I gradated the sky from dark to a lighter area on the right hand side. I also changed the color for the sake of variety. I also added a yellow and red lightly and loosely in the snow area. This was also for variety.
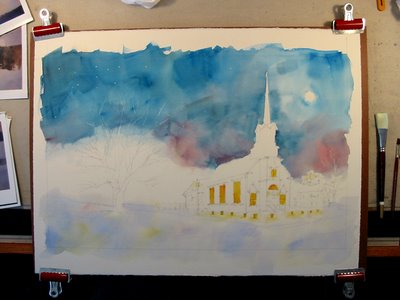
A yellow and red was was added in the window areas of the church. This same wash was also added where the luminaries light the path to the church.
The treeline was added varying the color as I went.
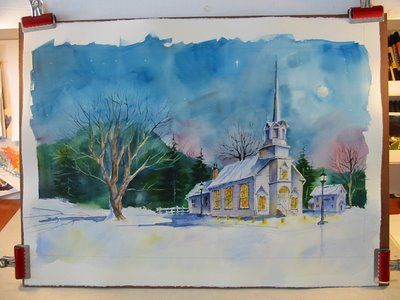
Washes were added to the church to define the light and shadow sides. These washes were also varied.
More detail was added to further define shapes.
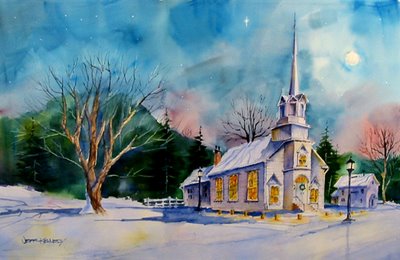
This is the final. It was used for our family Christmas card. The church is based on our church that we attend. The steeple was changed to show the steeple originally built with the church. Our church puts out luminarias every Christmas eve. When there has been a fresh snow, the reflections of the warm light against the snow is such an inviting view.
Wednesday, December 06, 2006
Sketches for paintings
Fishing On The Fox Gets Accepted!
Saturday, October 14, 2006
FLYSHOP - Step-by-step
This is the first painting I completed since taking my workshop. I felt a little rusty, but it felt good to throw some paint down on the paper. I will take you thru the process step-by-step. This painting was donated to the Midwest Chapter of Reeling and Healing. It will be auctiontioned off at a benefit with the proceeds going to the local Midwest Chapter. Reeling and Healing champions fly-fishing retreat programs for women diagnosed with or surviving cancer.
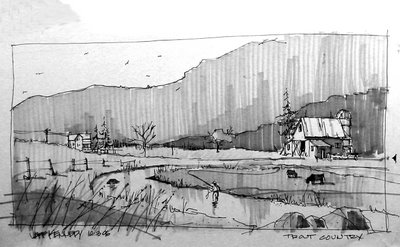
The first step of the process is to create my working sketch. This is completed with black pen and gray markers. My sketches are done in a 18"x24" sketch pad. The composition is from various elements brought together.
The next step was to pencil in the sketch onto watercolor paper. I used 140 lbs. Startmore Gemini for this painting. I changed the position of the drift boat because I thought it garnered too much attention in the position as shown in the working sketch. I also removed the rocks and changed the contour of the road. I typically sketch on my watercolor stock using a 2B or 4B pencil.
The next step is very important an often a step painters skip. I created a thumbnail value sketch to guide me in my painting. I will typically do 2-3 quick thumbnail value study roughs trying various value patterns until I find one that fits. I use a 4B and a flat carpenters pencil so I can quickly rough in the values. The value pattern is used was to have a light piece(small) surrounded by a dark shape (medium) on an overall midvalue field (biggest)
Now that I have a value pattern and my sketch is on my watercolor paper, it is time to get down to business. I thoroughly soak my paper and lay in the sky. I try to limit my time in the sky to 30 seconds. Anymore and I have the tendency to fiddle with it. I tip my paper on end to let the colors blend. I graduated the sky from dark to light. I also layed in the forground field using a large brush. The first steps look ugly, but you try to loosly get color and value in without the detail. Hopefully this will produce a fresh loose painting.
The next step I keep working in the colors and values. Referring to my value sketch. Since the midvalue is the largest, I typically work on this first. I can always go back and darken values if I need to. I try to not go into area more that twice. This helps to keep the painting looking overworked and muddy.
I wanted the painting to have a warm dominance. I contued to work the color and values, then I let the painting dry. The final step was to come in with the rigger and add my lines and my darkest darks. And here is the final.
Now it is critique time. I did not hit the dark values in the trees on the left side. They needed to be darker. The shape of the tree over the roof neede to foil the flyshop sign a bit better. The trees to the left of the fly shop are too similar in size and shape. No variation in size and the angles are similar. I will do this painting again, and try to do a better job with the values and make some additional compisitional adjustments along the way. Stay tuned for the next painting.
Saturday, September 09, 2006
Workshop Review
I just returned from my weeklong workshop with Tony Couch. All I can say is WOW! If you have the opportunity to take one of his workshops, I would encourage it. I traveled to Middletown Ohio to attend the workshop. And being the frugal traveler (read as cheap) I took my camper trailer to stay in. I found a trailer park 3 miles from the workshop to drop my camper. All the ammenities, water, electric and sewer. It cost me a whopping $50.00 to stay the entire week. One of the other workshop attendees who stayed in a hotel was nice enough to give me his complimentary USA Today every morning.
Tony has a great way of teaching watercolor. He is also a former student of Ed Whitney, who in his own right was one of the best watercolor instructors. Tony would start out every morning with a demo painting. He would verbalize everything he was thinking while painting. The afternoon was our time to paint. Around 3:30, we would have a critique. Tony would critique his painting that he completed in the morning, then critique ours. I would critique my painting and jot down what I would have changed. I would then compare these with what Tony would say. This is a great way to improve your skills.
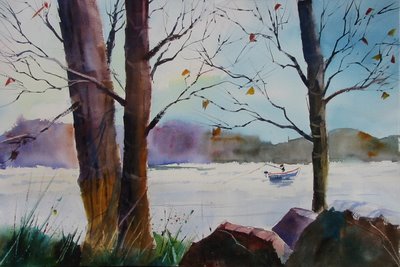
The above two paintings are from the workshop. The barn is a vignette which was completed in 1 hour. I tried to use a minimal amount of brush stokes to complete the painting. I was also employeing the vignette techniques we learned that morning. The second painting was completed in 1 1/2 hours. I employed the use of a dark forground a light mid ground and a mid value background. We were learning about the various value patterns, so I thought I would take a shot at one. The paintings are not the best, but they remind me of the valuable lessons that I learned.
In the upcoming weeks I will be posting more paintings. I an energized to paint and draw after attending the workshop. In order to maximize what I have learned, I need to practice! This is one of the best learning tools.
Friday, August 18, 2006
Workshop Preparation
At the end of this month I will be travelling to a Tony Couch Worshop for 1 week of nothing but watercolor painting. In preparation for the workshop, I have been practicing paintings from his workbook. The barn above is one of the exercises. I really enjoy his style and it closely fits the style I am developing. I am looking forward to meeting and learning from Tony.
Wednesday, August 09, 2006
Big Red
This is a quick line and wash sketch of "Big Red" the lighthouse in Holland Michigan. I am experimenting with line and wash techniques. Trying different techniques and applying the elements and principles of design. The one thing that I would improve is that neither the line of the wash is dominant. The center of interest is to close to the center. What is nice is I can try again with my own critique in mind. This sketch took 1 hour to complete start to finish.
Sunday, July 23, 2006
New Moleskine
I just had to try one of these beauties. The paper is not the same as watercolor paper, but it is better than sketchbook paper. This is the first drawing from my new sketchbook. I started by just throwing some watercolor. Just a random pattern and random colors. I then added the sketch of the "Old Brownie" from my shelf.
Friday, July 21, 2006
IT Has Been A While
I realize that I have not posted anything lately. My business has kept me away from blogging for a while (nice excuse). Anyway, here is a very quick and rough line and wash study of "Three Shapes". I found this refernece picture in a magazine and the shape arrangement intrigued me. More studies to follow...
Monday, May 01, 2006
This Is So True
“There are those of us who are always about to live. We are waiting until things change, until there is more time, until we are less tired, until we get a promotion, until we settle down — until, until, until. It always seems as if there is some major event that must occur in our lives before we begin living.” - George Sheehan
Thursday, April 20, 2006
Fishing On The Fox
Saturday, March 25, 2006
FINAL PAINTING
Here is the final paint of Autumn Barn. The painting size is 22" x 30". To produce the final drawing, I first started by designing the painting. I had some reference photos of barns I had taken on a recent vacation. I tried various compositions applying the elements and principles of design until I settled on a composition. I then created small thumbnail value sketches based on the final design. I also created small color studies to test various color concepts for the composition. I am happy with the painting, but there are some things that I would change. I will more than likely do another painting using this same design so I can implement the changes. As you can see, there is more to a painting than just painting. I enjoy the process and the rewards are very gratifying.
Jeff
Thursday, March 02, 2006
Saturday, February 11, 2006
Subscribe to:
Posts (Atom)