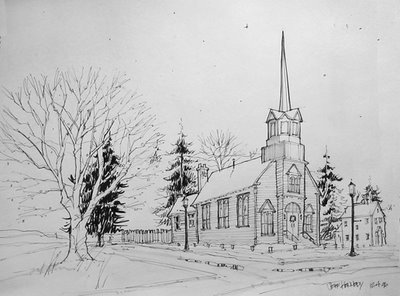
Here is the original sketch completed with felt tip pen and gray marker. This is the stage where I work out the composition for the painting. A number of sketches were completed so I could work out various compositional experiments.

Since this was to be a night or dusk scene, the values were pushed a few steps darker. No white paper would be visible. My target value pattern was a dark shape surrounding a light area (the roof).
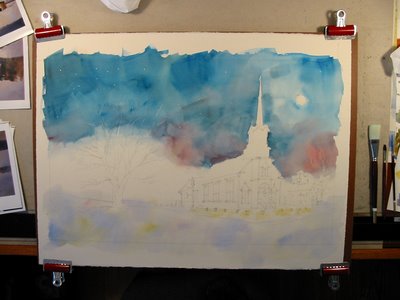
I completely soaked the paper and dried the church steeple area by blotting it with a cloth. I loosely applied the sky keeping in mind that I wanted it dark and that it would dry lighter. I gradated the sky from dark to a lighter area on the right hand side. I also changed the color for the sake of variety. I also added a yellow and red lightly and loosely in the snow area. This was also for variety.
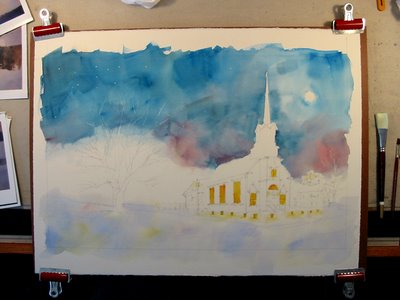
A yellow and red was was added in the window areas of the church. This same wash was also added where the luminaries light the path to the church.

The treeline was added varying the color as I went.
 Washes were added to the church to define the light and shadow sides. These washes were also varied.
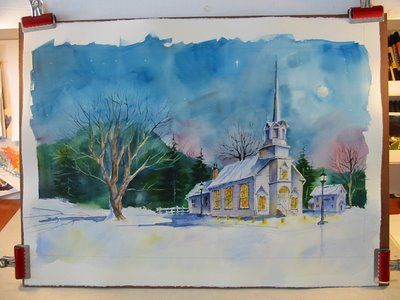
More detail was added to further define shapes.
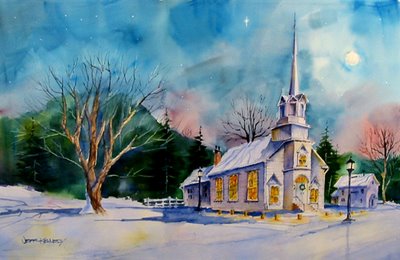
This is the final. It was used for our family Christmas card. The church is based on our church that we attend. The steeple was changed to show the steeple originally built with the church. Our church puts out luminarias every Christmas eve. When there has been a fresh snow, the reflections of the warm light against the snow is such an inviting view.

Oh my gosh, this is absolutely adorable and sweet!! I love it!
ReplyDeleteOh darn, this is what happens when I am doing two things at once! Sorry.
ReplyDeleteI meant to say how beautiful your painting is! Just gorgeous. It is so neat to see how you did it.
It's beautiful and thank your for the step by step.
ReplyDeleteMY GRACIOUS!! aWESOME!!!!! COLOR, LINES, FEEL!!! BRAVA!
ReplyDeleteyou handle watercolors so well. I love to see an artist progress on his work. Thanks for the step-by-step.
ReplyDeleteJeff, It's beautiful. Thanks for the step by step. Hearing and seeing your thought process helps me learn, too.
ReplyDeleteWow Jeff, i have just visited your site for the first time via France's Wagonized. I'm stunned at the amazing quality. And it really gives us viewers a feel/taste of your environment. I could have commented on so many of your pictures but I'll leave that for when I've got more time to really browse - I look forward to then. Amazing work.
ReplyDeleteFantastic painting. Thanks for showing WIP.
ReplyDeleteThis is a great painting -- thank you for the step-by-step!
ReplyDeleteThanks for sharing this progression - it's very helpful.
ReplyDeleteWonderful painting!!! The step process was enlightening!!
ReplyDeleteThank you so much for showing a work in progress on your blog. Watercolour intrigues me but I've never had the courage to give it a go. Your painting is absolutely beautiful!
ReplyDelete